Tag Archives: diy

April 12, 2013
16 Comments

Leather Wrapped Canvas DIY

When I got to the point where I could start to make some art pieces for my house, I couldn’t help but do a little happy dance. Beside the fact that I enjoy the creative process of choosing and making a lot of my own pieces, it also meant that I was far enough along in my home renovations to start to add “finishing touches.” Not that a house is ever “finished,” but you know what I mean…

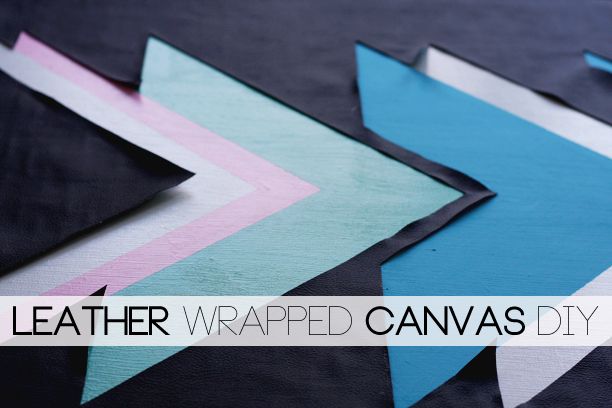
When I started thinking about artwork, I first reflected on colors and textures that seem to appear a lot in our home and leather was one of the first things that came to mind. I would probably make everything I own leather if I could, even my pajamas, but that would be ridiculous, right? (Note to self: google leather pajama options later). It doesn’t even have to be real leather either, I’m pretty well stocked on the faux variety as well and love it just as much. So, I decided to take that love of leather and bring it to my walls as well. It took a bit of trial and error for me to figure out the best route, but it turned out to be one of my favorite projects I’ve done so far.

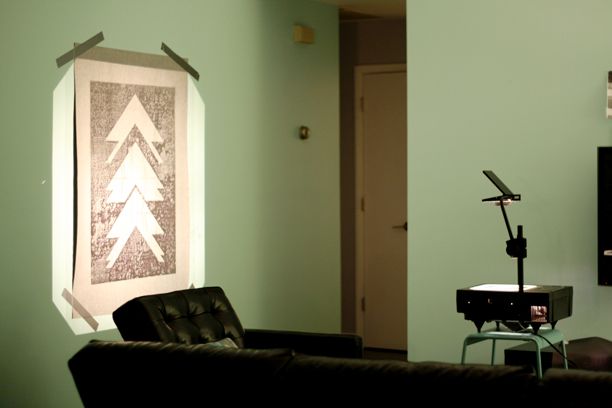
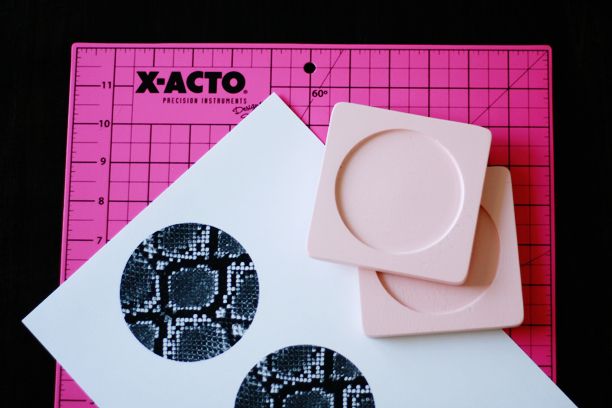
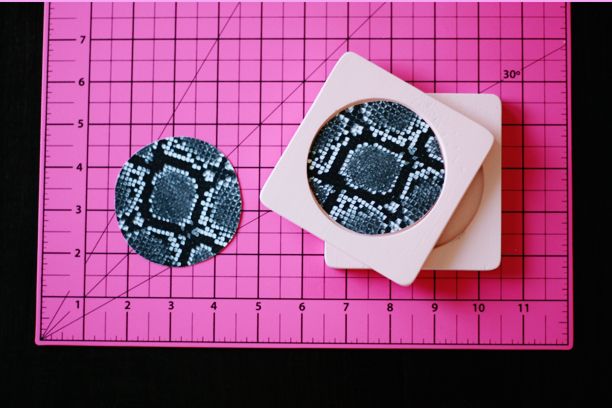
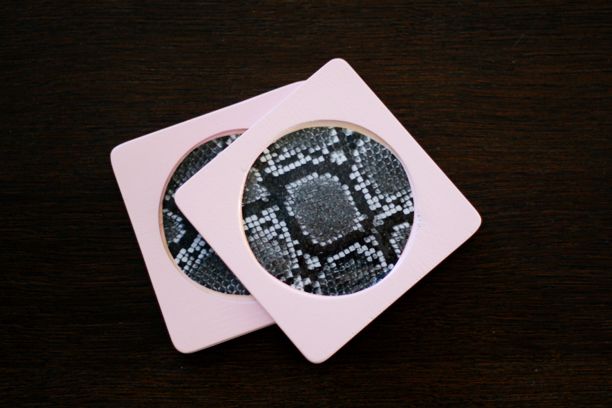
First I printed my pattern onto a clear transparent projector sheet and projected the image onto the wall. If you don’t have a projector, you can just draw your pattern by hand or trace a stencil, but I love my projector and I highly recommend getting one if you don’t own one already. I taped my sheet of faux leather (faux leather is much less expensive and animal friendly- double win!) wrong side facing out so I could trace my design on top. Once it was traced, I was able to cut out the parts where I wanted the canvas to show through with an X-Acto knife.

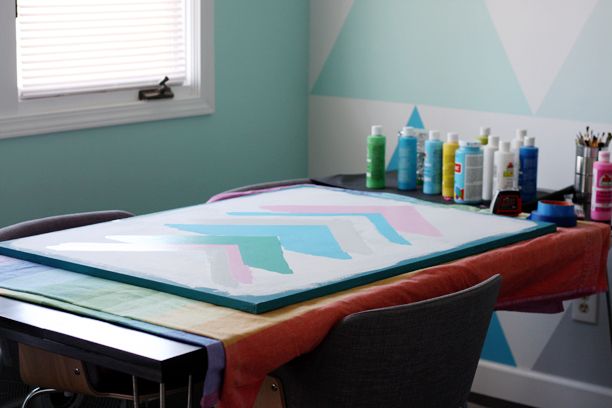
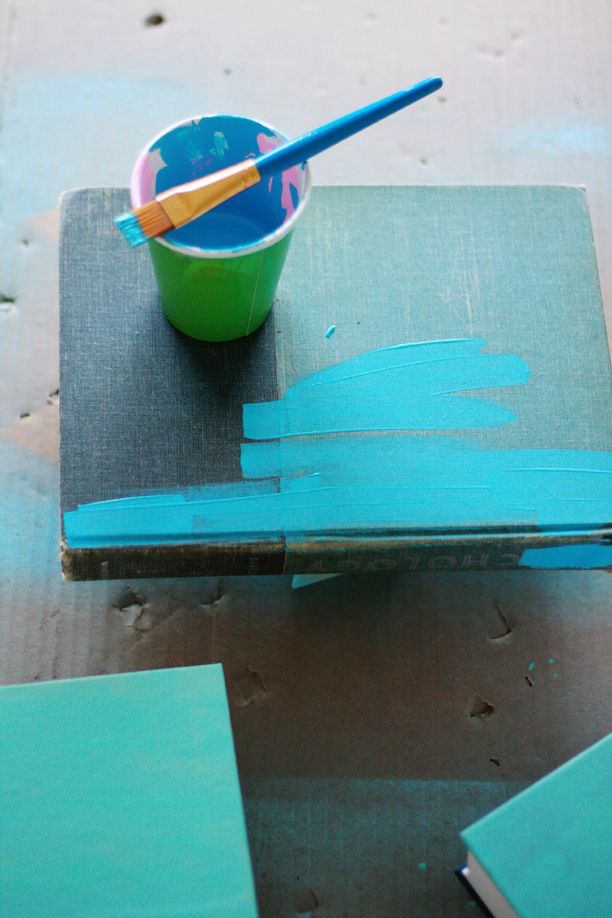
Once the leather is cut, prepare your canvas by painting your shapes or design that will be seen under the leather. You can lay your leather piece over top of your blank canvas first and trace the shape so you can see what areas should be totally filled with your design. I must say that I was a little overzealous with the amount of shapes that I was trying to line up exactly, so I would suggest doing something a little simpler if you don’t want to take the time to line each one up perfectly.

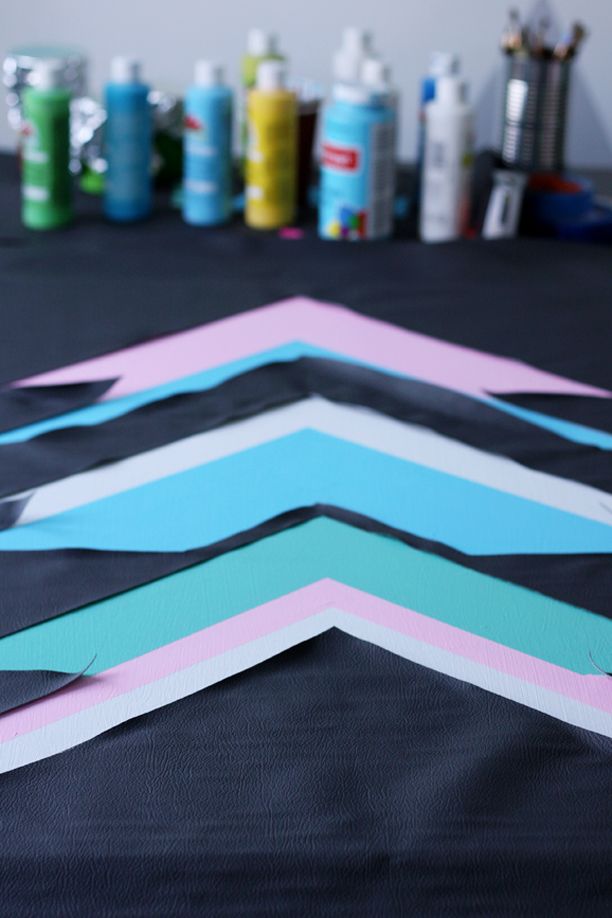
Once your design is painted, place your leather over top and line the two up so that they meet in the right spots.

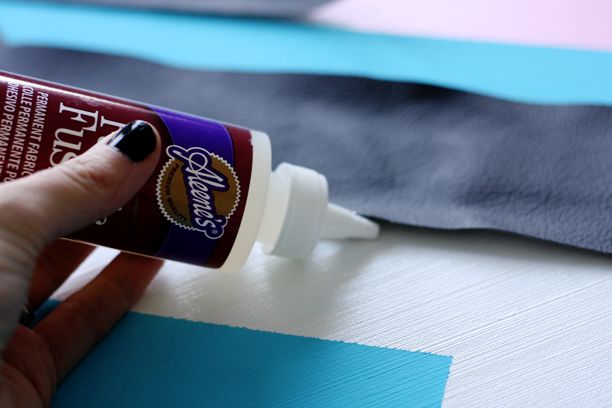
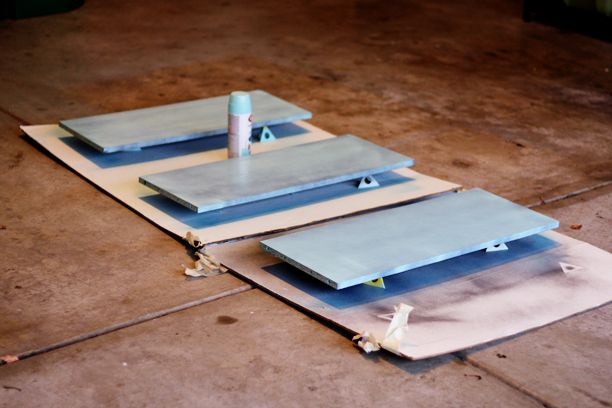
Next, use a fabric glue to attach your leather to your canvas and add some weights (like paint bottles as I did) to any edges that you don’t want to curl while the glue dries.

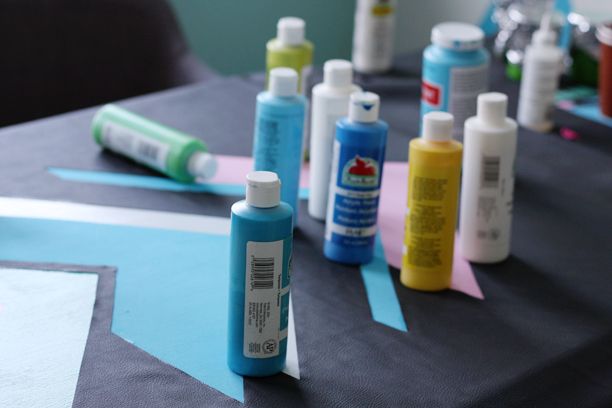
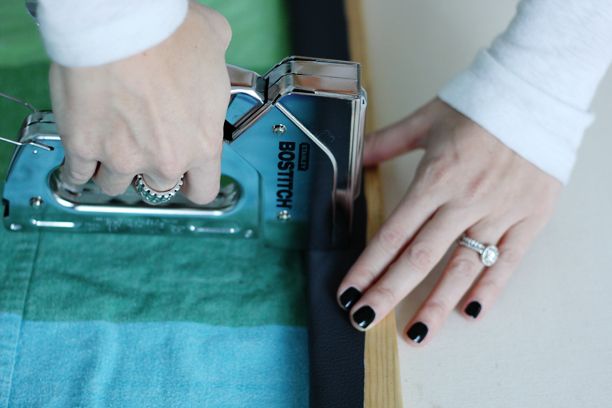
Next, wrap the leather edges around the sides and staple them in place with a staple gun. This will give your canvas wrapped edges on the sides so you won’t have to frame your piece if you don’t want to- it will already look finished without a frame!

By the way, if you are wondering what to do with the corners, I wrapped mine the same way you would wrap a present and stapled it in place.

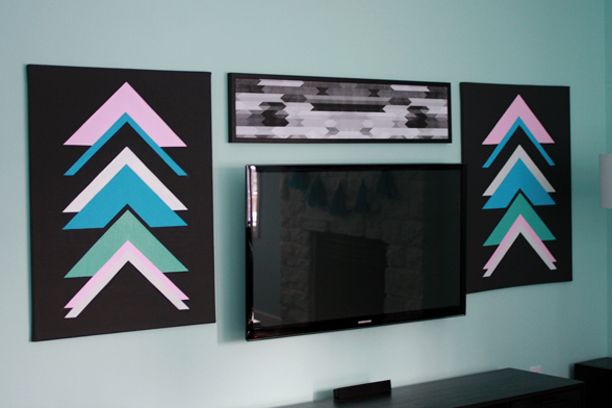
This is definitely a project that you’ll have to devote a bit of time to if you are doing a complicated version, but you could make it relatively quick if you were doing a smaller canvas or a simpler design. Either way, it was well worth the effort as far as I’m concerned. I love the look of the finished project! The pieces look so textured on the wall, and I can’t wait to use leather in more art projects around the house.

Hope you get a chance to try this too!

signature

March 20, 2013
19 Comments

Chevron Leggings DIY


If you had to guess what category of clothing I wear most in my everyday life, you would be correct if you answered “leggings.” You would be incorrect if you answered “harem pants,” “crop tops,” or “anything made of hemp/linen.” Leggings are the best because they are super comfy cozy and they allow you to move around at will. Ever wear a pair of wide legged pajama pants to bed and find yourself all tangled up in them, paralyzed from the waist down and calling out for help? Well, that’s not going to happen with leggings. No sir. They fit like a second skin, freeing you from the potentially perilous trappings of wide legged accoutrements.

So, what better way to pay homage to leggings than to spice up your dreary plain pair with a super easy stamp DIY? There are some pretty sweet design-on-the-knee tights out there (like these), and chevron patterns are all over my house, so I figured if I put them on my clothing too I’ll blend right in like a chameleon. Finally, no one will notice that I’ve been on my couch for ten hours watching a Duck Dynasty marathon…

Using foam sheets, cut out three “v” shapes for your chevron and glue them onto a sturdy piece of cardboard (something simple like Elmer’s glue should be fine). I tried on my leggings first and marked where the top and bottom of the pattern should hit with a piece of tape so I would have a guide when stamping. I used Tulip Soft Fabric Paint in metallic gold and silver and painted a generous amount on my stamp. I would suggest inserting a thin piece of cardboard into the legging knees so that the paint doesn’t bleed through to the back layer when you stamp the pattern.

Two stamps later- voilĂ ! Your knees are stamped. As far as DIYs go, this is a pretty simple and quick project. Think of all the things you could stamp on leggings: cats (of course!), skulls (duh!), hearts (I want, I want!), even sea anemones (wait, what?).

With all the possibilities, I think I’m going to need some more leggings!

signature

March 15, 2013
6 Comments

Snakeskin Coaster DIY

Everyone has at least one piece of furniture in their house that they are particular about. There might be a certain chair they don’t like pets to sit on or maybe a rug they won’t allow potentially dirty shoes near-for me, it’s my coffee table. It was the first real piece of furniture I bought after I got out of college and I finally didn’t have to share everything with roommates. The table was quite a financial splurge for me at the time, and so I took extra pains to make sure that there was always a coaster nearby whenever I sensed a drink approaching it’s richly dark finish.

We have had the same plain wooden drink coasters for-like-ever, so I decided it was high time to give them a makeover. I mean, the coasters should at least be as cool as the table they are sitting on, am I right?

I first lightly sanded the coasters and applied a few even coats of Krylon Satin spray paint in Ballet Slipper.

I then used Photoshop to create snakeskin patterned circles the same size as the indent of the coasters and printed out them out onto white card stock.

Once the circles were cut, I used Elmer’s Glue to adhere the paper to the circular indent in the coaster and set a glass on top of the paper so the edges wouldn’t curl as it dried. Once the glue set, I added three coats of Triple Thick Glaze (with adequate dry time in between each coat) so that wet glasses could be set on top of the printed area.

Because I am such a weirdo about my coffee table, I also added those little felt circles to the bottom of each coaster. I always cringed before when I heard them sliding across the table, and now they make the most lovely “whoooosh” sound instead.

Overall, I really love how they turned out! Instead of sad little weathered coasters, they are now fresh and bold with a graphic twist. I think I just heard my coffee table breathe a sigh of relief…

signature

March 9, 2013
10 Comments

Painted Books DIY

As much as I’ve loved (and hated at times) finally getting a home of our own that we can decorate however we want, I think I’ve been most surprised at how little I have to decorate with. Oh sure, we have all the big pieces of furniture covered, but I’ve noticed for the first time that I’m missing the little details in between that can really add that extra punch of personality to a space. It’s been fun starting to collect those items and imagine all the different grouping possibilities, but all those little purchases can really start to add up, and so I’ve been trying to think of some low cost (or free!) options. That’s where these books come in!

I love books grouped in coordinating or monochromatic color schemes, but it can be hard to find exactly the color you need. We got rid of a bunch of books in the move, but I saved a few various sizes of cloth covered books so that I could try painting them the colors I wanted for the mantel.


I used acrylic paint in three different shades to cover the outside and spine of each book (at least two coats for each book). I found that it worked best to use a paint with a little bit of gloss so the books don’t appear chalky as the fabric cover soaks up the paint pretty well.

Once your paint is dry, use a fabric marker to add your titles. I was able to pencil in the titles first and erase the preliminary marks relatively easily, so if you like to be extra precise, I would recommend adding that step.

I love going to people’s houses and seeing what books they have lying around. You can learn a lot about people just by spying on their bookcase! For that reason, I used a mixture of real titles that have special meaning for us along with made up ones that reflect what our life is all about. Although, if I wanted to reflect what my life is really about, I should have added books like, “101 Recipes for Eating Your Loneliness,” “My Cat is My Best Friend,” and “Workouts You Can Do From Your Couch.” I guess I’ll try and appear a little classy for company. Whateves.

All in all, this was a really easy project that added a bit of color and personality to our living room. One finishing touch down, a million to go!

xo. Laura

February 24, 2013
9 Comments

Bookcase Shelves DIY

One of my favorite perks of our new house is that it’s a three bedroom setup. That means that Todd and I both get a “bonus” room (apart from our bedroom) to make into whatever we want. His room is a music room (no surprise there) and I finally get to put together an art space where I can create, craft, and store all my decorating purchases and art supplies. Although my art room has a fantastic closet with lots of room, I wanted to keep my most used items out where I could easily access them at a moment’s notice. There’s always an excuse not to do something creative (you’re tired, feeling uninspired, or there’s a Law and Order SUV marathon on), but I didn’t want inaccessibility of supplies to be one of those reasons. Thus, I decided that I wanted several shelves on which to perch those supplies.

We ended up with an extra bookcase in the move (one just didn’t fit where I thought it would when I bought it), so I took the shelves off of the old one and set about turning them into free-standing shelves.

I lightly sanded each side of the shelves with a moderate grit sandpaper, wiped the dust off with a damp rag, and spray painted 2-3 coats of Krylon Blue Ocean Breeze spray paint (leaving adequate dry time in between each coat).

I bought white shelf brackets at Lowe’s and attached the brackets to the wall with wall anchors to give the shelves more stability in holding the weight. We attached the brackets to the wall first and then placed the shelf on top of the brackets, marking where the final set of screws should go with a marker. Using a drill, we pre-drilled our marked holes, making it much easier to attach the board to the brackets.

A bit of work, but overall, not too bad! It felt great to recycle some of the bookcase material and put it to good use instead of throwing it out, and it saved the me from having to buy more wood for the new shelves. A win all around!

signature