

If you are a thrifter or flea market junkie, you already know the thrill of finding items that have good “bones” and are just in need of a little updating. Some makeovers can be pretty drastic while others involve small changes, but even those small scale makeovers can yield big results. We have the good fortune of having a pretty decent sized master bedroom in our new house, and one corner in particular seemed too roomy to leave empty. In order to fix the problem, I brought my desk into the space so I could have a little area where I can charge my laptop, etc. I had started using the chair that usually accompanies the desk as my drawing chair in my art room, so I was in need of an alternative seating companion for the desk.
Todd tried to convince me that the seat was unnecessary and it wouldn’t look weird at all to have a desk with no chair, but I shot him a look that told him he was to be seen and not heard on this issue as he was obviously spewing crazy talk, and set out to look for a chair. I found this little guy (below) at a flea market for under $20, and thought that its mid-century Danish inspired look would make a good restyle project for the space.
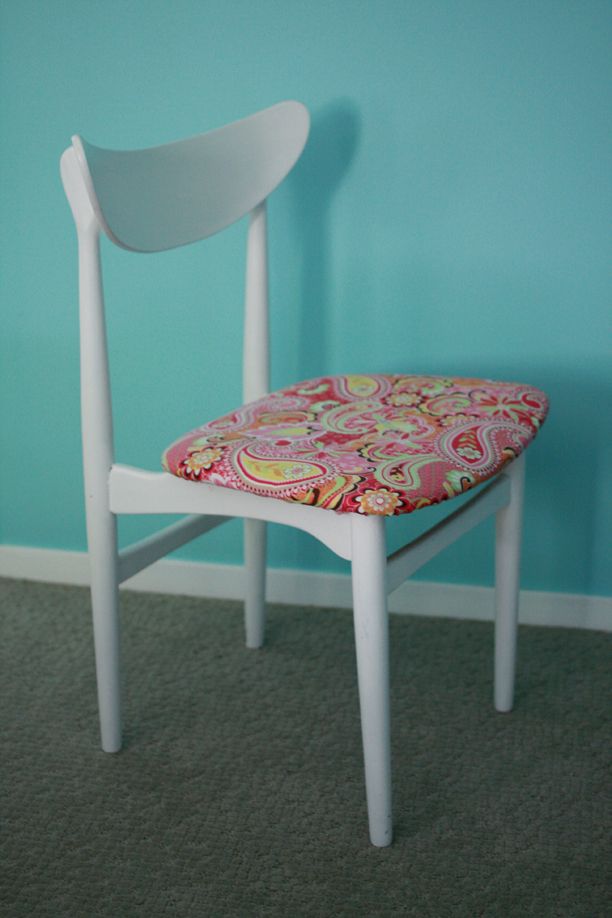 First of all, this fabric HAD to go. I mean, I’m all for a fun print, but this was making my eyes literally melt off of my face, and I’m not much of a paisley person to boot. I bought some grey faux leather at a local fabric store and unscrewed the seat from the chair in order to recover the rainbow eyesore. Thankfully, the chair seat was only screwed in with four screws that came out easily, so I didn’t encounter much of a struggle.
 I traced a shape that was about four inches bigger than the seat all the way around and used a staple gun to attach the fabric to the underside of the seat. The curved corners were a bit tricky, so I would love to know the real upholstery secret to getting perfect rounded corners, but I did my best guesswork, and it didn’t come out too bad at all.
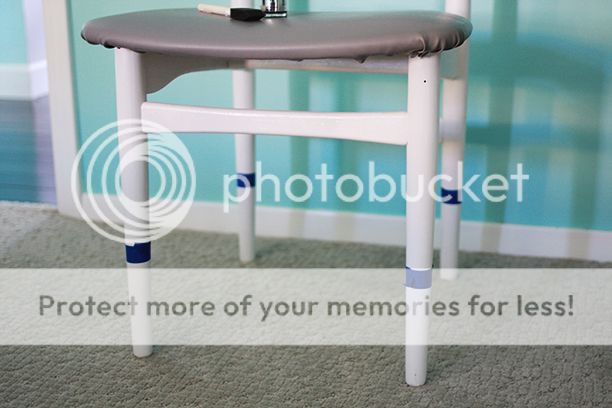 I used painter’s tape to block off the bottom of each leg and coated the bottom half with liquid silver leaf paint to achieve the dipped furniture look that’s been floating around the internet lately.
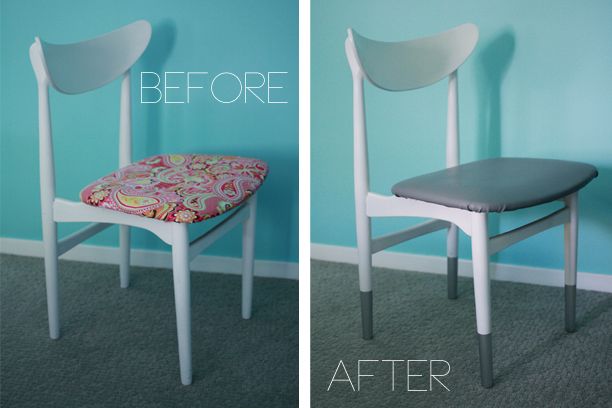
It’s a relatively subtle change to just switch the fabric on a chair and dip the legs, but it really made a big difference in the space and I’m thrilled with how it ended up.
 Now I have an area that’s totally ready to charge a laptop or give me a space to sit and write thank you notes for all the chocolate people could send me in the future (hint, hint).
Although, don’t send me too much chocolate, or I may have to reinforce the chair…

The chair looks great! The paint on the legs gives it that little extra touch and make it stand off the carpet nicely.
Cute! What a fun re-style. I love the “dipped” chair legs
I’ve been searching for new chairs for my dining table forever!!! I found it at a little antique store (it’s a circle shaped mint green formica number – I love it), but it didn’t come with seats! I think I may have found some though, I’m super excited.
Alex from http://www.polkadottedpixels.com