
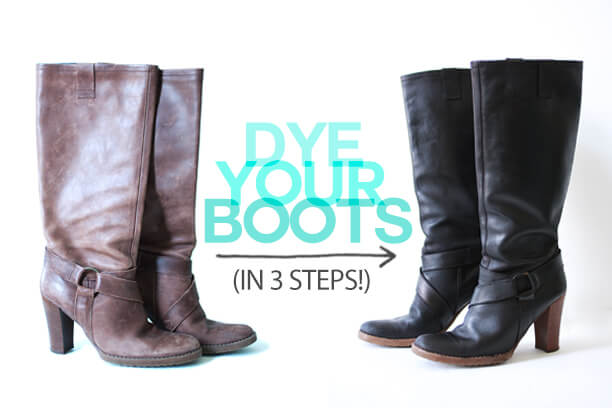
 OMG. Did you know that you can dye your own leather boots yourself? As a leather lover (and a DIY lover), you would think that little detail would be something I was already familiar with, but I had no idea that it was possible until a friend of mine mentioned it to me recently. The idea would have interested me anyways, but I was especially excited because I’d been complaining about not being able to find a black version of some weathered brown boots that I’ve had for a few years. Leather dye? Problem solved.
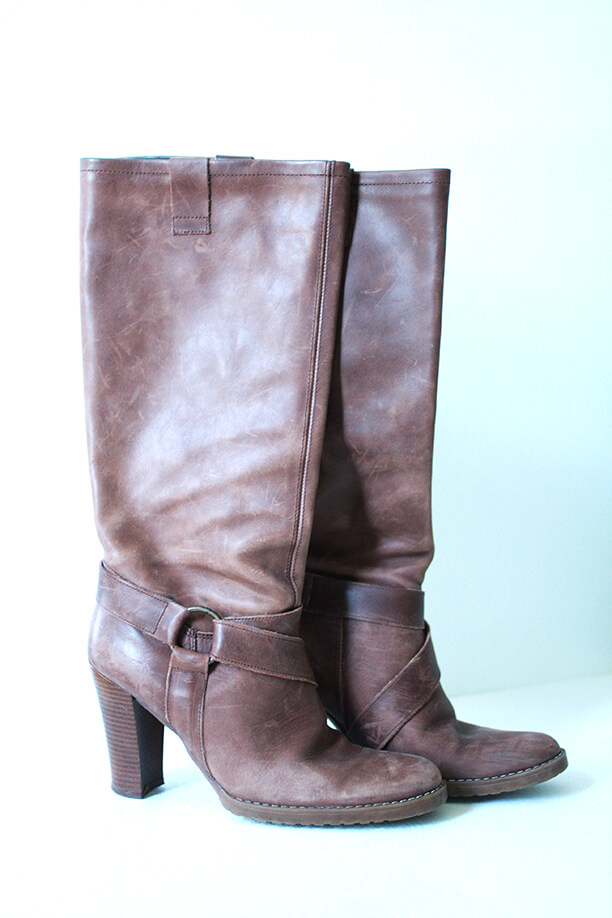 Here’s what my brown boots looked like before the transformation. I bought them years ago and they have definitely been worn quite a bit since then.
For this DIY you’ll need: Leather deglazer, leather dye, leather sheen finish, wool daubers, and cotton rags.
NOTE: This dye process is for tanned leather only, but they do make a dye for suede that I haven’t tried yet, so that is definitely a possibility too…
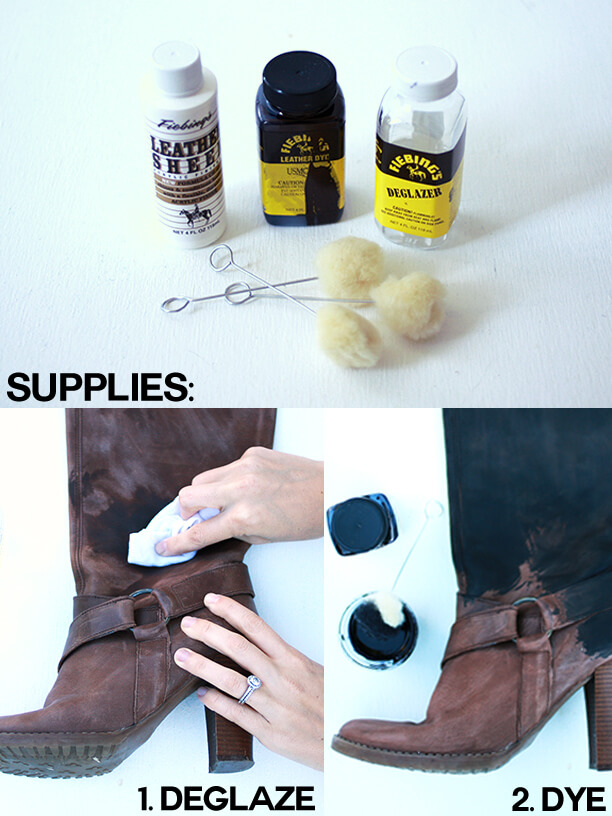 1.) Most leathers have a finish that needs to be removed before the dye is able to penetrate the surface of the leather. Use a cotton rag and rub the deglazer all over surface of your boot (I would do this step outdoors if possible, the fumes are really strong).
2.) While the deglazer is still damp, pour your dye into a small disposable container and dip your wool dauber into the dye. FYI, I would use rubber gloves during the dying process if you want to keep your hands in tact. Use the dye and wool dauber to completely cover your boot in the dye (I used a small paintbrush to paint the dye where the sole and heel meet the leather) and let dry for 30 minutes. Add a second coat of dye if needed and wait another 30 minutes before lightly rubbing off any excess dye with a cotton rag (just wipe gently, don’t scrub the leather).
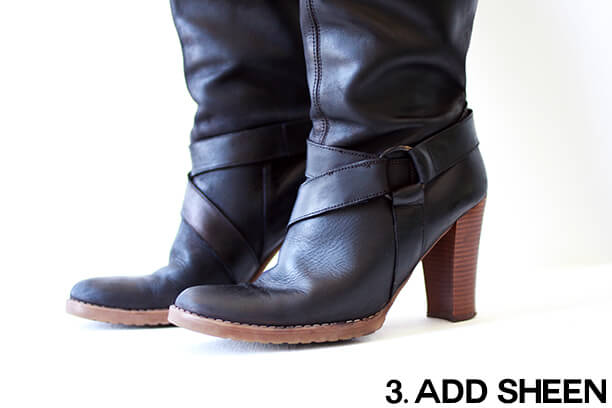 3.) Once your dye is dry, don’t worry if your boots are looking rather dull and splotchy- that’s what this last step is supposed to correct! Pour some leather sheen onto a rag and buff the leather in small circles all over your boot surface. This should bring out the sheen and richness of the new color. That’s it- you’re done!

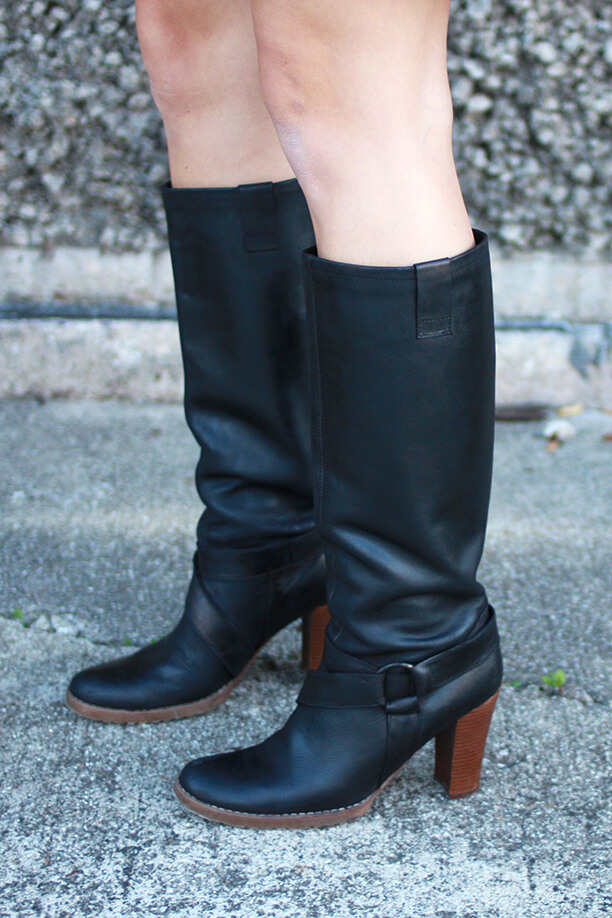
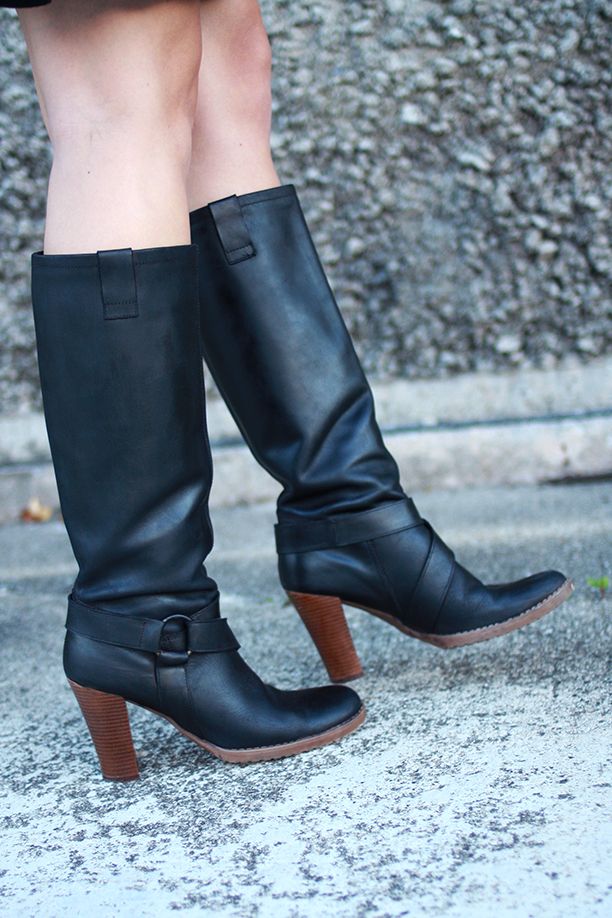
I can’t tell you how happy I am with the final product. I was really just hoping that the boots would be good enough to wear until I could find a better (and newer) pair of black boots, but they turned out so well and look so revitalized that there’s no need to look any further for a replacement. Not that I won’t buy any more black boots this fall in other boot categories (you know, like booties, ankle boots, flat knee-highs, over the knee, some with more studs, some with less studs..).
Black boots are to my closet as pizza is to my mouth- you can never fit enough in there. Now that I think about it, I do have a pair of suede camel colored boots that may be in store for a makeover as well…
xo. Laura