Tag Archives: diy

August 21, 2013
11 Comments

Glitter Letter Planter DIY

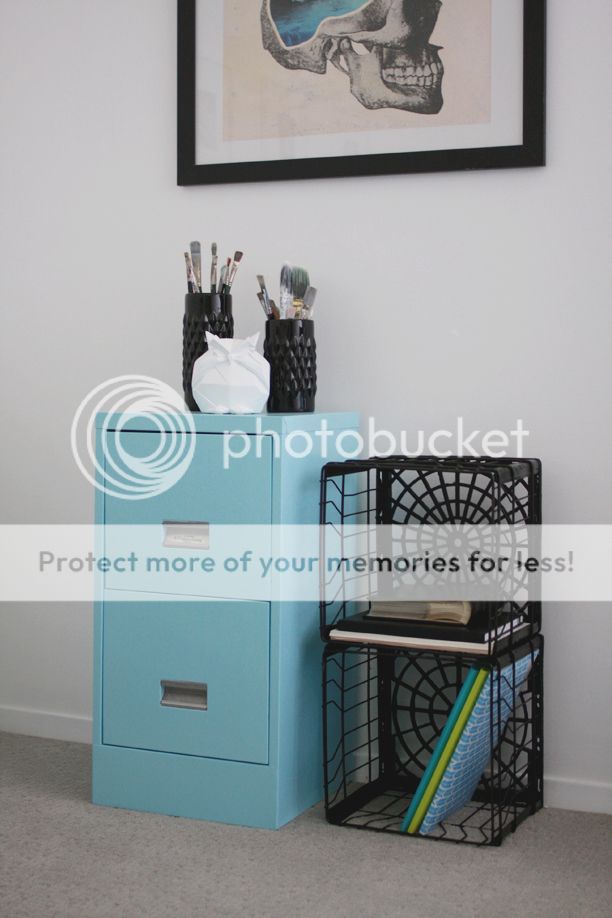
It seems like I enjoy acquiring plants more and more as time goes on. Even though there have been some rough patches in my plant relationships (you know, like when they get all rude and die on you? Whateves plant, I didn’t like you anyways…) I have really enjoyed finding new nooks for friendly plant faces in our house. Of course, giving a plant a proper home involves some sort of planter, but to be honest, I was kind of annoyed to see how much planters can cost- and most of them are super boring, so that’s not really a wallet opening incentive.

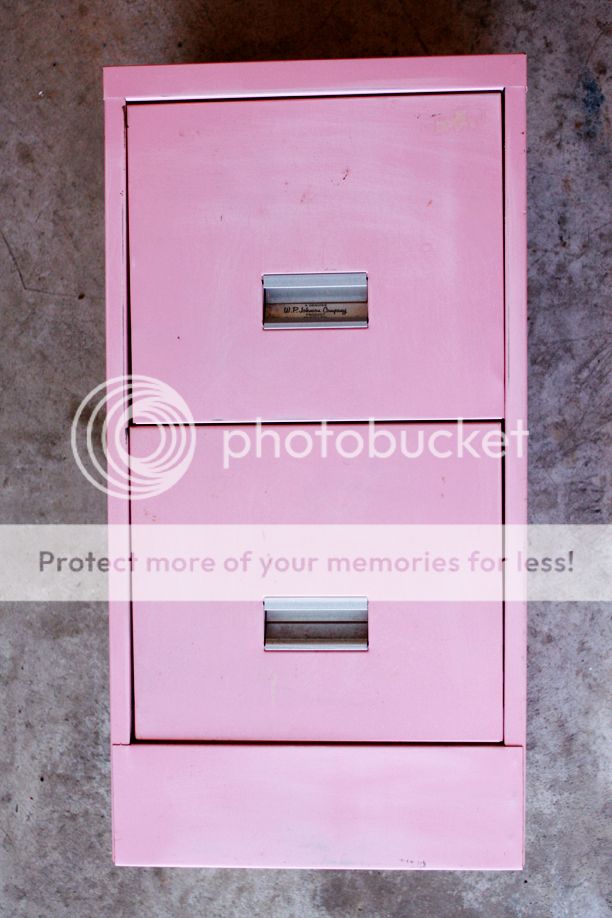
The answer to my expensive/boring planter query? It’s either winning the lottery or DIY, and since Todd’s lotto ticket addiction hasn’t paid off yet, I guess it’s a DIY then…

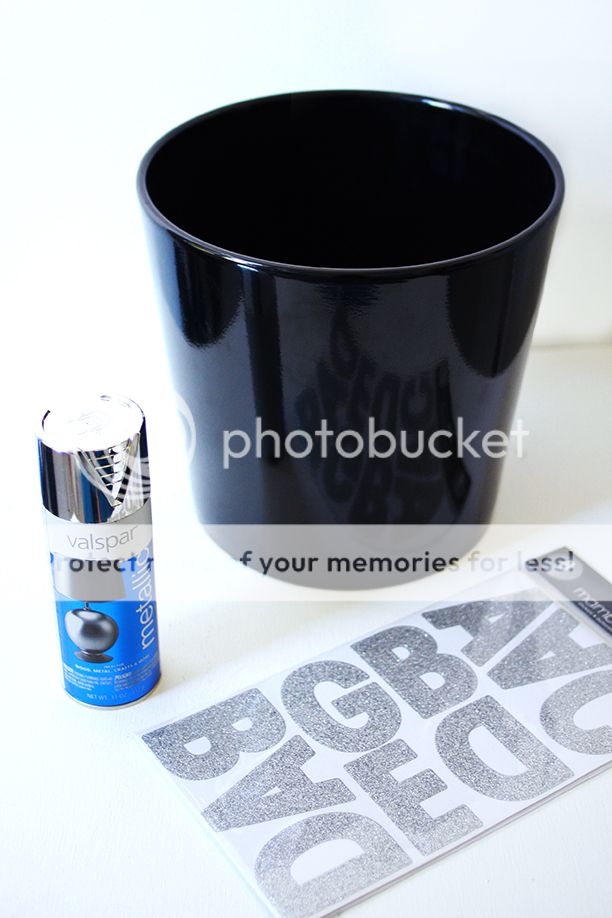
I bought a plain black planter and Valspar Metallic spray paint in silver at our local Lowe’s store. First of all, let me say that I have use a lot of spray paints in my life, but right now I’m a bit addicted to Valspar’s Metallic gold and silver paint. It’s the best spray paint I’ve found so far, it covers really well, so keep that in mind if you need anything metallic in the near future. I also bought some giant glitter letter stickers at Michael’s for the project. And for everything else in my life. I mean seriously…

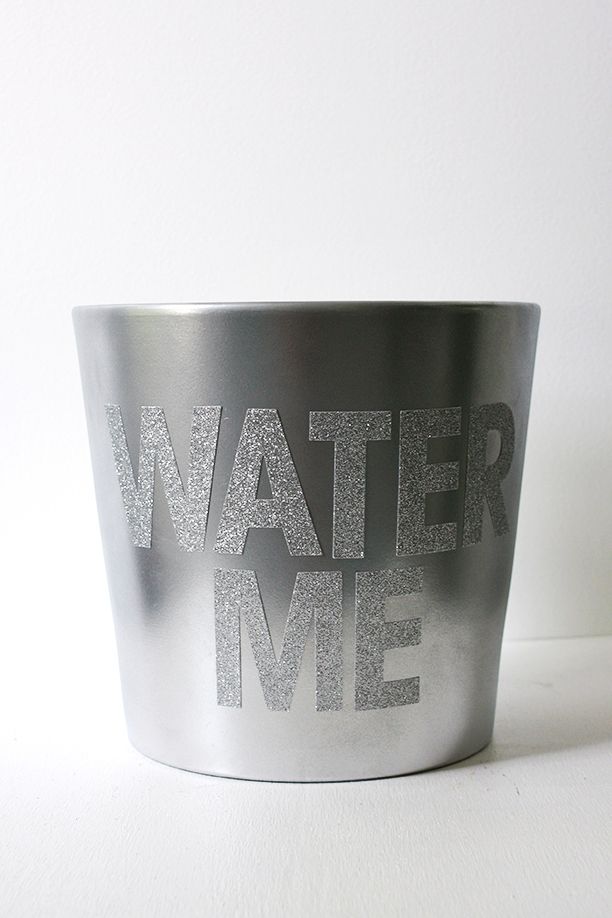
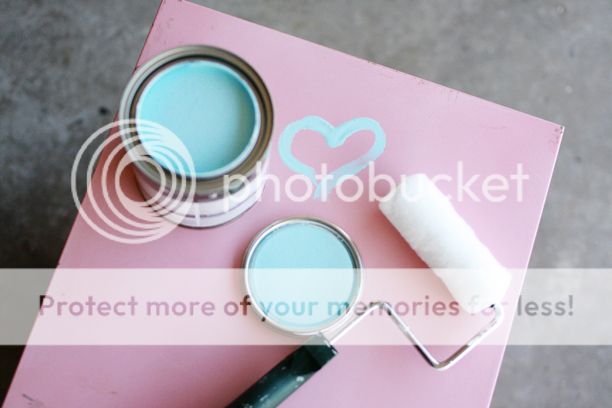
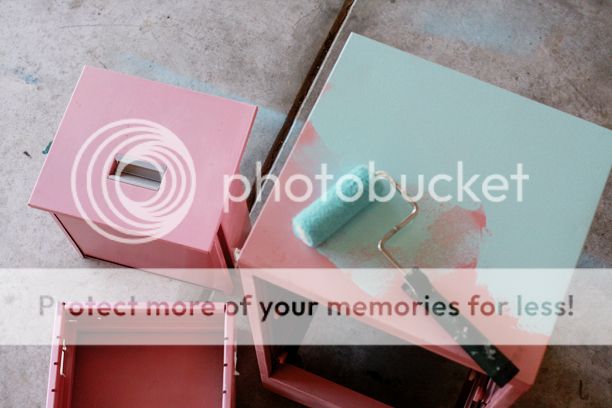
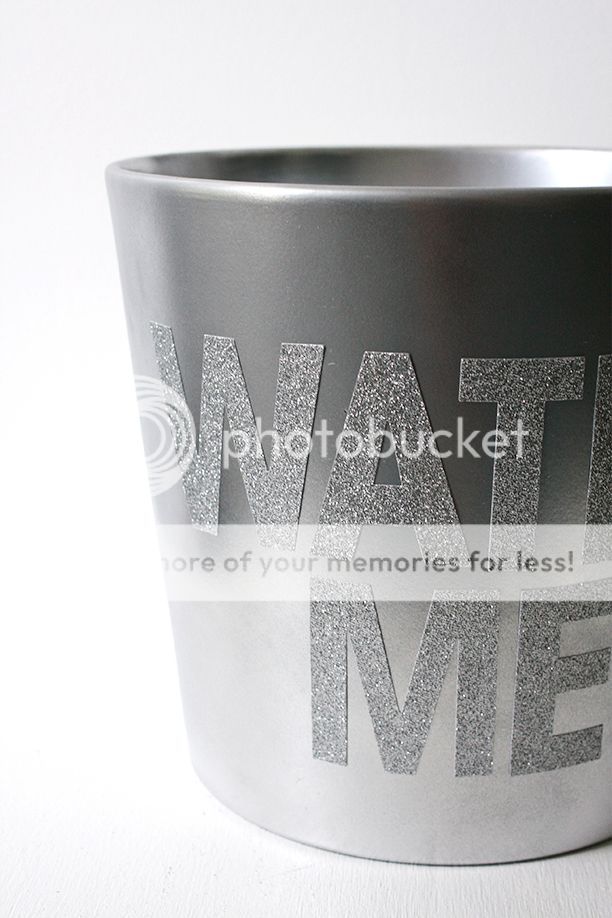
All I had to do was give the planter a quick covering with my silver spray paint and stick on the letters once the paint was dry. Done. DIYs don’t get much easier than that!

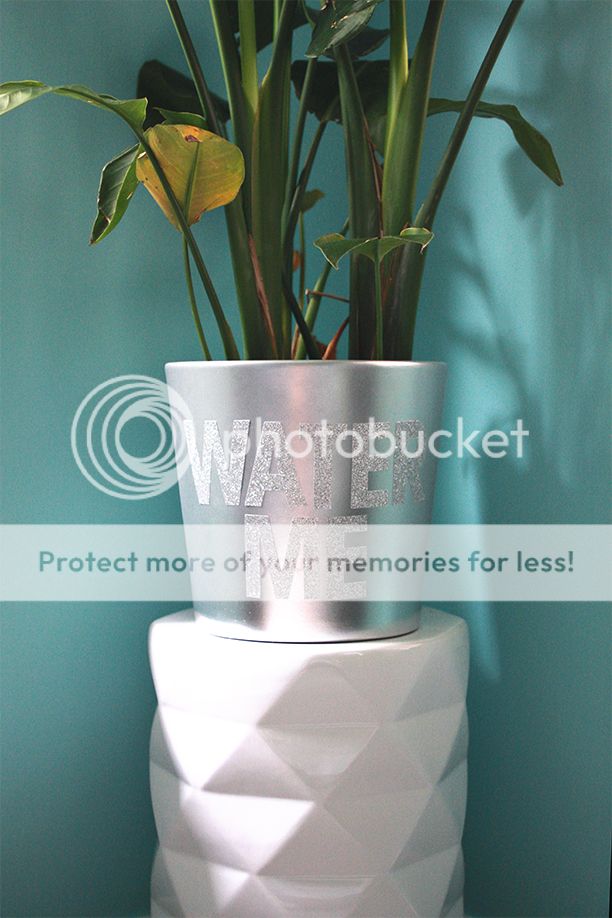
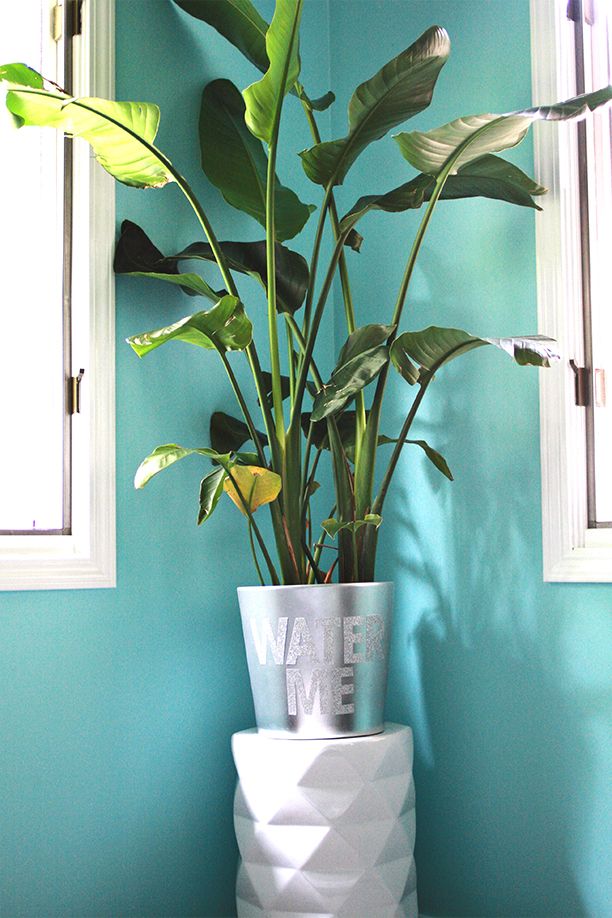
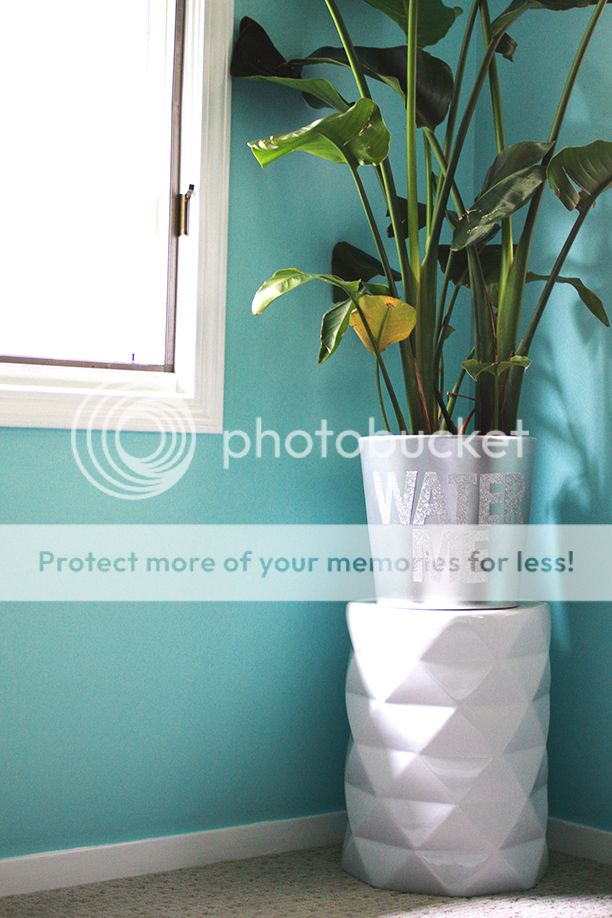
Maybe it’s silly, but it makes me smile to put little phrases on or around objects. Can you imagine all the other things your plant could be saying to you? I thought about doing “Please keep the cat away from me” or “I’ve seen you in your underwear,” but those were too long for this planter.

What would your plant want to say to you?

signature

July 8, 2013
7 Comments

DIY Painted Mirror

Plain mirror, mirror, on the wall…what’s the best way to de-uglify you? Paint! When we first moved into our new house (which you can read about here, here, and here), I quickly noticed that the previous owners had left us a lot of…uh…”presents.” They left all their hangers in the closets, rusted jewelry on the counters, three boxes of cleaning supplies, old moldy rug scraps, and a pile of dirty diaper trash in the garage. I guess they really wanted their dog to feel the joy of giving, and allowed him to leave lots and lots of presents all over my new backyard. Thanks. Thank you SO much for that.

Among the pile of presents, they also left a mirror that they had installed in the master bathroom to replace the standard giant-plate-of-glass one that had been there before. The mirror was certainly not the ugliest I’ve ever seen, but it wasn’t really wowing me either, so I decided that finding a quick makeover idea for it would be best for all involved.

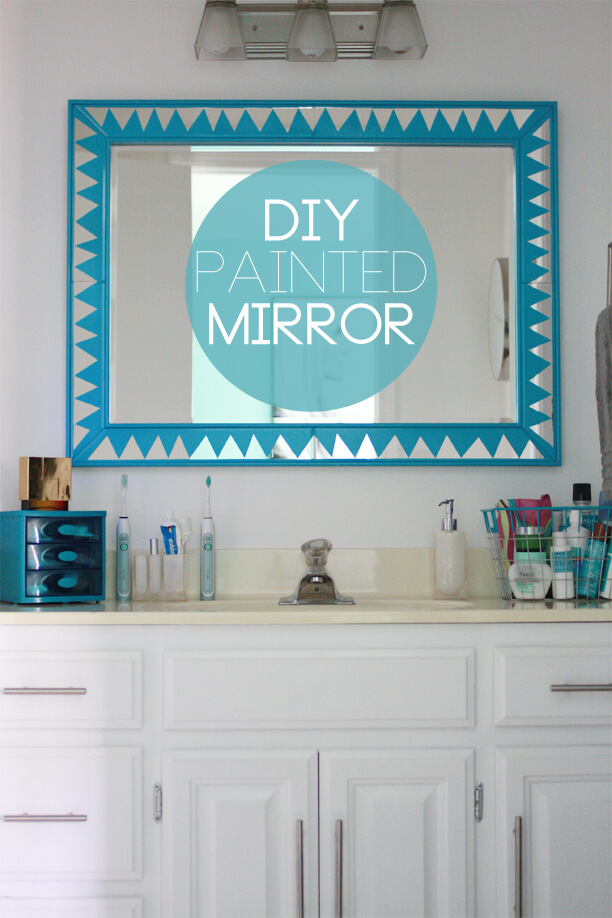
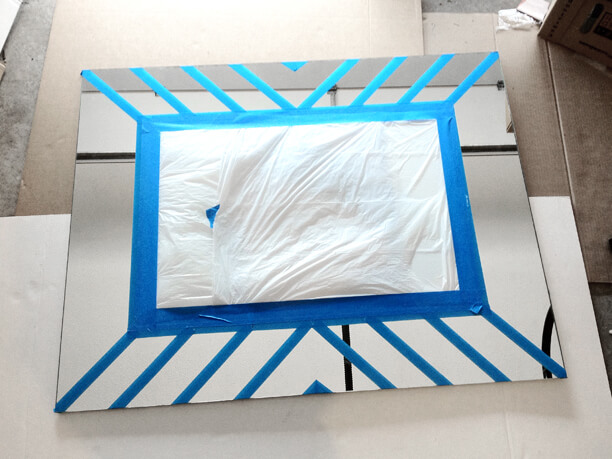
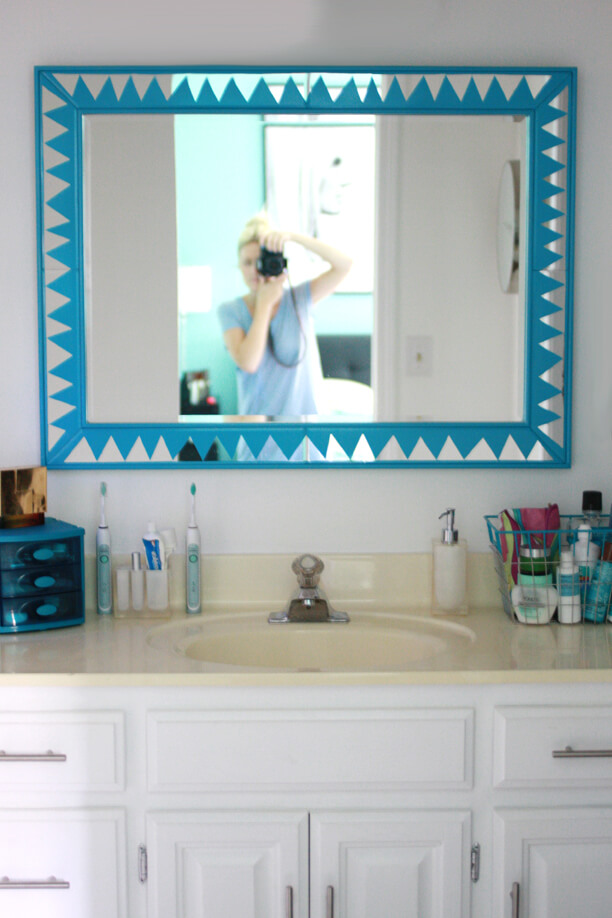
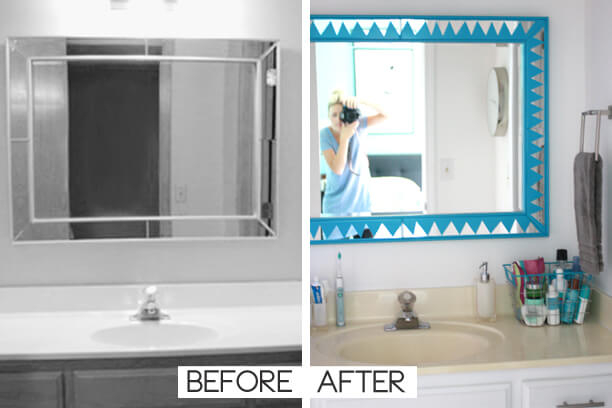
I had rolls and rolls of painters tape sitting around the house since I was in the middle or renovations, so I grabbed a roll and started to cut out triangle pieces and stick them on the outside border of the mirror. Once I went all the way around the outside edge with my pattern, I taped a trash bag over the center of the mirror so that would remain unpainted when I was finished. Next, I took my chosen spray paint color, and did two light coats of paint, waiting for adequate dry time between coats. Once the paint was dry, all I had to do was carefully peel off the tape, and voilà! The mirror was ready to hang!

(I did another mirror in the house with this pattern above. I tried to take a few pictures of it to show the finished mirror, but the mirror is so big and the bathroom is so small that I couldn’t figure out how to get it all in frame! But at least you can get the idea of what it should look like when it’s all taped and ready to be painted…)

Depending on how complex you want your tape pattern to be, this is a relatively quick and easy mirror makeover and a great way to add a pop of color to any room in the house. Now get out there and find a mirror to paint!

xo. Laura

June 4, 2013
9 Comments

DIY Cat Stamp Cardigan

YES! CAT STUFF!! If you’ve been depressed lately because my “You’ve Got To Be Kitten Me” archive isn’t filling up quite as fast as you had hoped, then get in line because it only takes two people to make a line. Me and you. That’s who’s in the line. There are some pretty adorable DIY animal prints out there (like this cutie), but there can always be more cat themed merchandise, and when I can’t find exactly what I want, I usually try to make my own.


I took a white cardigan that I was bored with and dyed it teal before starting the stamping process. I’ve learned that when you’re too lazy to stir your bucket of dye and fabric for the suggested 45 minutes that the bottle tells you, you can end up with a subtle tie-dye feeling that I’m pretty into. But, really? Forty-five minutes, are you kidding me? Like I’m going to spend the entirety of my Law and Order SVU episode stirring a bucket of blue dye…I’ve got better things to watch.


Anyways, I used some craft foam to cut out my geometric cat face and glued the shape onto some thick cardboard to make a stamp. Once that was done, I painted the stamp with a generous layer of fabric paint and got to stampin’. You should do a few test stamps first to gauge how much pressure you need to stamp your garment, but it’s also helpful to have a small brush for touchups if needed.

As you can see in the last photo, Charlie is totally aware that she is posing in a cat related photo shoot, and is definitely not thinking, “GET. ME. OUTOFHERE.”

I’m quite pleased with my cat cardigan so far. It kind of reminds me of polka dots in a more whimsical way since the cat reference isn’t too obvious. It’s actually been hard not to take that cat stamp and skip around my house marking everything I see with a feline face, but I’ve restrained myself so far. Well, this is one more project to add to my kitty file here on the blog, I think it will eventually be quite the cat-egory, if you know what I mean.

Sorry. I had to do that. I “kitten” resist.

signature

May 16, 2013
11 Comments

Filing Cabinet Restyle

So, Todd has been out all this week in New Orleans writing and recording for the band’s new record. It’s no secret to those to know me that I can be somewhat of a pessimist about situations in life, but Todd is the biggest easy-going optimist you could ever dream up, so that has helped balance me out over the years. I’m always sad to see him leave (of course), but it does help to think of the time that he’s gone as an opportunity to get some things done on my project list and watch all my tv shows that he hates (Kim and Kourtney Take Miami, anyone??).

One of those recent projects was this makeover on a filing cabinet I found at the flea market. It came in this lovely pink color that I adored, but the hue didn’t work with its intended locale in the house, so I needed to rethink the paint job. Storage is always an issue in a home (especially in an art studio type of setting), so I decided that this vintage filing cabinet could help me house a good portion of my paints that are currently stuffed out in the garage.

All the cabinet needed in prep work was a light coat of sanding with a medium grit sandpaper. Once I wiped down the sanded paint dust, it was ready for the transformation.

I chose the Glidden color True Turquoise in a latex paint for extra durability and ended up doing two coats for full coverage.

Thankfully, I was able to wiggle the drawers out of the cabinet before I painted, which made the whole process much easier.

Seriously though, there are few things that I love more than storage that looks good. I left the little company tag on the top drawer to keep some of the vintage charm, but I’m really pleased at how fresh and bright the cabinet turned out.

If you need some storage, filing cabinets are a great way to get organized and there are various shapes and sizes all over the flea market world. Todd will be home tomorrow, so I’m trying to finish any projects tonight so we can spend some relaxing time together this weekend. Can’t wait!
signature

May 1, 2013
6 Comments

Leather Pocket DIY

You should know by now that I’m pretty obsessed with leather. I didn’t make good on my recent threat to find and purchase leather pajamas, but I also didn’t specify a time limit on that sweet idea, so it still may happen. A less over-the-top option to add some more leather into your life is to sew a leather pocket onto a chambray shirt or a tee. I recently found this shirt at one of those places where everything is kind of designer (and 99% off retail) but has a hole or a broken zipper. How do you cover a small rip on the chest? Leather pocket! I know making pockets of out leather isn’t anything new (see great examples here and here), but it’s still happening because it’s still awesome, so jump on the l.p. train while you still can.

I made a template from an existing shirt pocket and pinned it to my leather scrap. (NOTE: I learned through this process that pinning is a BAD IDEA. It left holes (duh!) but I didn’t think that one through before I did it. I heard that you can use glue instead of pins when working with leather, so that’s probably a better idea to avoid holes. You’ve been warned). I cut a half inch around the template so that I would have enough to fold the edges under and give the pocket finished edges.

I cut out any extra leather at the folded corners so that the leather met (and didn’t overlap) to cut down on bulk. I then sewed all the way around the pocket and left enough room between the stitch and the outside edge so I could fit another row of stitches in between.

Next, I pinned my pocket to my shirt and sewed around the outermost edge of the pocket (leaving the top open of course).

Overall, it was easier than I thought it would be! I would suggest getting the thinnest real or faux leather you can find so it will bend and not look too thick on the shirt. But now that I have this project under my belt, I keep picturing all my other items of clothing with leather additions as well. Maybe I will get those leather pajamas after all!

signature